Thursday, February 25, 2010

Contest pictures


Please ignore these photos. I am applying to be part of a new design team and needed to store the pictures online.


Wish me luck :-)


Coupon Mania


Wednesday, February 24, 2010

Video #26 Rose Love Card

I have a new video for you today. It is using a new stamp I got in. I love the look of this stamp. I hope you enjoy the video.


Supplies used:

rose stamp by Victorine Originals www.victorineoriginals.com

markers by Close To My Heart

paper from Michaels

ribbon by Doodlebug Designs

Cricut Cutting Guide

ProvoCraft sent out a handy guide to help with your Cricut. It will help you to achieve the perfect cut no matter what material you are using. I hope this helps you!

Scrapbook Paper and Cardstock - Standard Blade Machine Settings: Speed 2 (Low), Pressure 5 (High), Blade Depth 5, Multi Cut 1

Bazzill, textured paper/cardstock - Standard Blade Machine Settings: Speed 1 (Min), Pressure 5 (Max), Blade Depth 6, Multi Cut 1

Fabric (0.023"/0.58mm thick) - Deep Blade Machine Settings: Speed 3 (Med), Pressure 4 (High), Blade Depth 5, Multi Cut 1
Note: Use a thin iron-on interfacing with the fabric, set the iron at its highest temperature setting. Apply direct heat and pressure to flocking for approximately 30 seconds. Peel protective liner when cool. Wash and dry garment inside out.

Magnet (0.035"/0.080mm thick) - Deep Blade Machine Settings: Speed 2 (Med), Pressure 5 (Max), Blade Depth 6, Multi Cut 4

Stencil (0.0155"/0.40mm thick) - Standard Blade Machine Settings: Speed 2 (Med), Pressure 5 (Max), Blade Depth 6, Multi Cut 2
Note: Adhesive is repositionable. Replace liner to protect adhesive during storage.

Chipboard (0.059"/1.50mm thick) - Deep Blade Machine Settings: Speed 3 (Med), Pressure 4 (High), Blade Depth 6, Multi Cut 5
Note: A fresh mat is needed to hold material. Small pieces of chipboard may require tape to stay in place.

Emboss (0.0160"/0.41mm thick) - Standard Blade Machine Settings: Speed 3 (Med), Pressure 5 (Max), Blade Depth 6, Multi Cut 2

Stamp (0.0415"/1.05mm thick) - Deep Blade Machine Settings: Speed 3 (Med), Pressure 4 (High), Blade Depth 5, Multi Cut 1
Note: Use a fresh mat to keep material firmly in place.

Friday, February 12, 2010

Video #25 Valentine's Day Card

Here is my latest video. In the video I talk about my upcoming surgery. Well, that surgery has passed. I had to have surgery on my right shoulder. I am slowly getting back into crafting but I do still have few videos ready to go. I hope you enjoy this one.


Supplies used:

stamps: Owl set www.victorineoriginals.com item #10547-X

markers, ink, ribbon & paper: Close To My Heart

cardstock: Georgia Pacific from Walmart

pencils: Prismacolor

Monday's Organization Tip


Uggghhhh. I just realized that my Monday organization tip was never posted.


Here goes.... I have found that the easiest way to store stamp pads is to buy a cassette tape holder. I turned my ink pads upside down, they store best this way because it keeps the ink always at the surface. Then I used a Sharpie marker to write the stamp pad name on the side. This way I can easily see which color I am looking for.


I hope this helps!!


Wednesday, February 3, 2010

Video #24 Frugal Card Making

Hi guys.... I wanted to post this new video showing how to make a card using repurposed items. Those things around the house that you normally don't think of using. I challenge you to find something around you that is not meant for scrapbooking or card making and make a project with it.

I hope you enjoy the video!!


Monday, February 1, 2010

Monday Organization Tip!!

Hi everyone.... I have decided that Mondays are going to be organization tip days. We all need help organizing our supplies better and let's be honest, it's just plain fun to play with our supplies.

I have a small addiction to ribbon. I have tried to come up with many ways to store it and none have ever worked for me. I don't like keeping it on the rolls because they take up way too much room.

This is how I am doing it now. I am rolling all of my ribbon onto doll clothespins found at Michaels or AC Moore. I used to secure the ribbon with a piece of tape on the end but as you will see in the later photos, the tape kept coming undone. Now I am using a sewing pin to secure the ribbon. It works fantastic.

I hope you feel inspired to come up with a ribbon storage system that works for you.


Ribbon on clothes pins and a picture of the sewing pins I am using to secure the ribbon
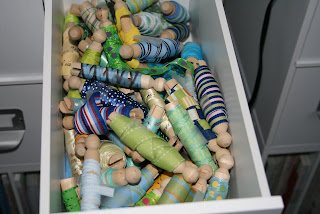
my bin of multi color ribbon (looks like I need to buy more)
my purples, browns, blacks and whites


my blues, green and yellows


my pinks, reds and oranges


ENJOY!!


Disney Give A Way

Hi friends... I wanted to share this goodie with you. I have this really cute Matterhorn page element that is perfect for Disneyland. I don't have any use for it (sadly Disney World does not have this ride) so I thought I would offer it up to those who would like it. Just leave a comment on this post with a way for me to contact you if you win and I will send it out. I will draw a winner on Wednesday the 3rd at 12:00 PM EST.


Top Scrapbooking Blogs

LinkWithin

Blog Widget by LinkWithin